Laura's Buttermilk Biscuits I know, there are thousands of buttermilk recipes out there that claim to be the best. This one is the one that works best for me. I do not like to fool around with complex recipe's that require a lot of time when preparing breakfast. This one suits my time and morning skill level perfectly. If you do not have buttermilk on hand, just add a teaspoon of lemon juice or white distilled vinegar, stir and let sit five minutes. The best advice I have on the fluctuating buttermilk measurement is to feel it out. The dough should be a bit sticky but not soaking wet and also not dry. I have failed for years at a biscuit I love, this one was perfect for us. I have made it easy to grab this recipe by adding the title and complete recipe as a photo below. All of the recipe sites with tons of ads and complex ways to print make me crazy. Just save the image and enjoy! 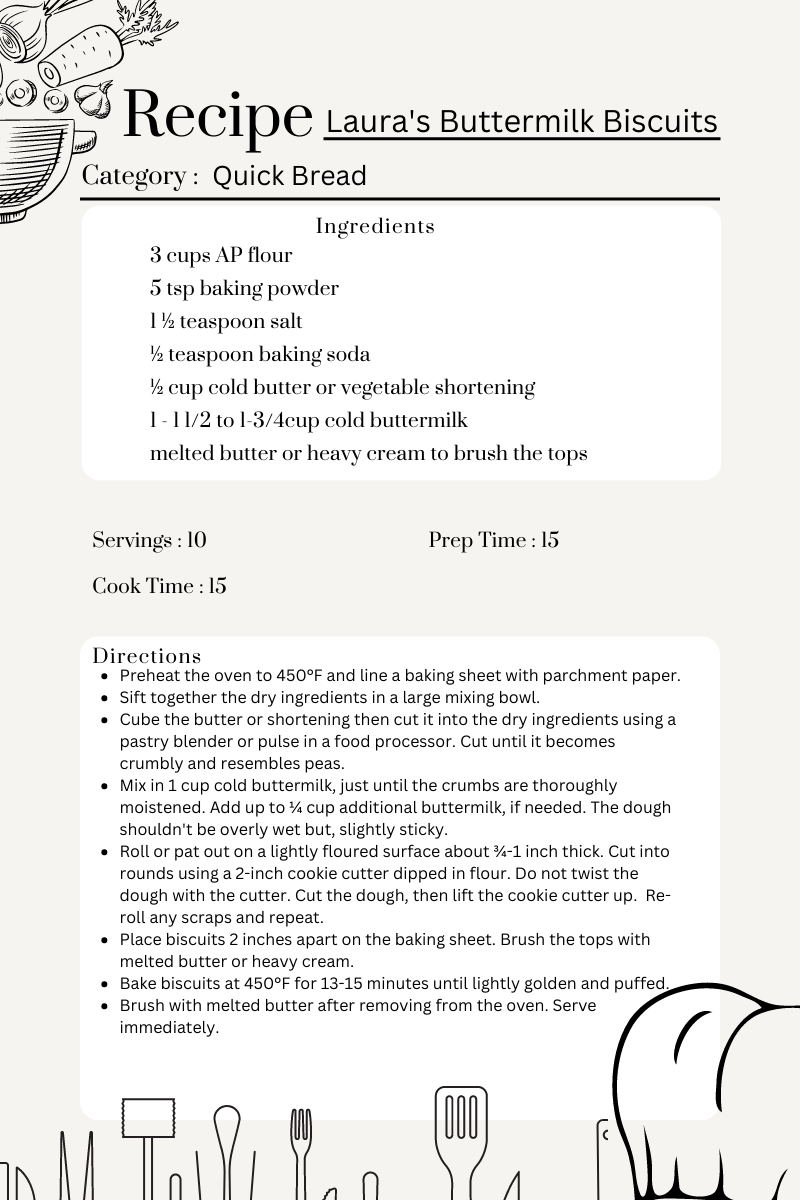
0 Comments
Easy Bearnaise Potatoes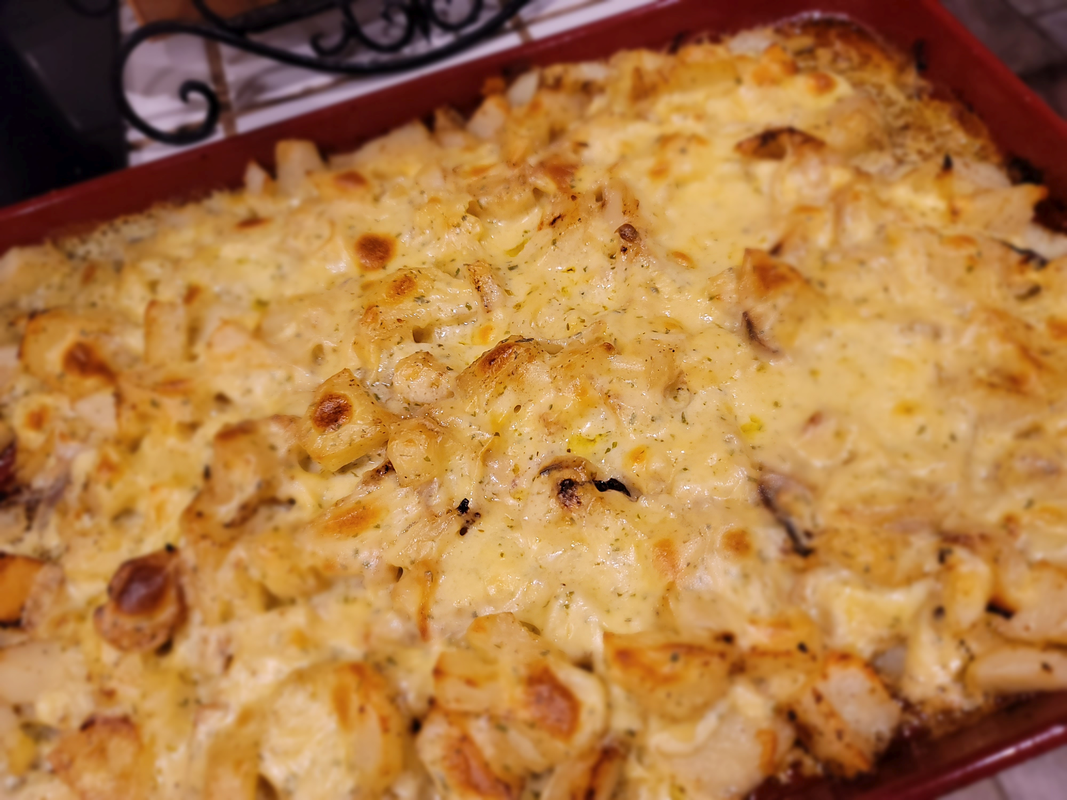 This recipe came about because my family loves cheesy potatoes but that recipe can be very time consuming and it never really has the flavor I want. These are roasted potatoes that are covered in bearnaise sauce and then browned. Super simple! This has been a year of time on my hands but lack of will to post anything. I had time to organize my life and be fit as a fiddle but that did not happen. It has been filled with fun days shared with my grandson Presley and trying to redefine our budget in the midst of going from two incomes to one. I have tried to keep my joy in the chaos this year and I hope all of you are well too. Ingredients
Instructions
Enjoy! Gumbo & Grits  Everyone has their own recipe for gumbo and mine is mine. My daughter Katie has a love affair with grits just like her momma. This gumbo is one that I have tweaked over the years to fit our tastes. The grits are from Palmetto Farms and they are in my opinion the best. Alber's in a box will work in a pinch but you will never go back after trying those real yellow grits. This whole dish is warm and comforting on a bad day, a cold day or a Monday just because. Give it a try and tell me what you think. Ingredients
The How To Season those chicken thighs and brown them in a large stock pot. You can brown them in a bit of oil and butter. Set the chicken aside and start the roux.The most important part of this dish is the roux. You can cook it for five minutes or an hour depending on how deep you want the flavor and how much time you have. I'm impatient on most days and only stir it around for about five to ten minutes. Place the oil in the same stock pot over medium heat until it is just getting hot. Add the flour in and stir, keep stirring until it turns brown to your liking. Add in that onion, carrots, celery and keep stirring for another five minutes. Add the sausage and stir for a minute or so. Now add the chicken and all of those seasonings. Keep stirring until it all starts to smell delicious and sizzle. Add the stock and lower the heat to a low simmer and let it cook for about 30 minutes.
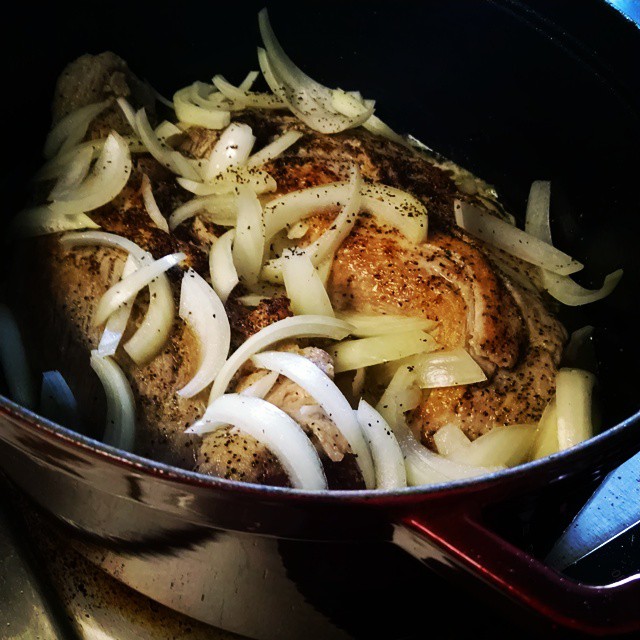
Now, let's talk grits. Bring the 8 cups of water to a boil with about a teaspoon of salt in the water. When the water is at a rolling boil, WHISK in the grits. Lower that heat down to low and cover the pot. Stir then every few minutes to keep them nice and smooth. Simmer for 30 minutes until thick and smooth. Turn the heat off, add 1/2 cup of butter, stir and put the lid on for a few minutes. While the grits are soaking in the butter stir the gumbo and add the shrimp. Those shrimp will be done in about three minutes so shut the heat off after that and give it a good stir. Give those grits one more good stir to mix the butter in well. Dish a large spoonful onto a plate and place a big scoop of gumbo on the top. Enjoy! Tomorrow I turn 44 and others will tell me all day to "Beware of The Idea of March!" that it is also the day that Julius Caesar was assassinated as well. Oh well, from what I hear he had it coming anyway and I don't believe in that particular juju of the day being bad luck. This month has been full of crazy and self exploration. When I get nutty and introspective I cook. This means that my family will get great meals but they will also get crazy, they take it in stride. This week was particularly crazy at work so I roasted this chicken to a lovely brown, it died a good death. This recipe is delicious and it all ends up in a cast iron pan which you pop in the oven and let it do the magic. It is simple, delicious and made with love. By a raving female... The Ingredients
Directions This is the easy part. Cut up tomatoes into chunks, chop the onion and garlic. Pour 2 Tablespoons of olive oil in the oven safe skillet, get it hot. Heat the oven to 375 degrees. Pour the 1/4 cup of flour on the chicken and give it a toss. Lightly brown the chicken in that pan. Toss all of those tomatoes, onion and garlic right on top of that sizzling chicken. Add some more salt and pepper. Place the skillet in the oven for 45 minutes. Toss the sliced crusty bread on top, spoon pan juices on the bread and kick the oven up to broil. When the bread has browned it is all done. We gobbled this one down so fast that I never got a picture of it plated. So so good! Let me know how you like it.
* If you use the boneless skinless then add 1/2 cup of chicken stock to the pan when you bake. And then go learn how to eat real chicken!  Ever have a sugar cookie that you just have to have at least two or ten of? This is it! I get dozens of orders for these sweet little gems every year. They are rich, buttery and surprising light. They are of course full of ingredients that make the holidays worth baking for. The beautiful basics such as my favorite butter and real sugar. Now, I am no sugar cookie pro. I have all of the same struggles as anyone else would have but these things are very easy to make and they will knock the socks off of the friends and family who get the pleasure of enjoying them. If you try one recipe this year, this should be it. I'd love to hear you're feedback once you've made them. Enjoy! The Cookie Ingredients 4 ½ cups all-purpose flour 1 teaspoon baking powder 1 teaspoon cream of tartar 1 teaspoon salt 1 cup unsalted butter (butter not margarine) 1 cup sifted powdered sugar 1 cup granulated sugar 1 cup cooking oil (vegetable oil) 2 eggs 2 teaspoons almond extract (must use almond for taste) In a medium mixing bowl stir together flour, baking soda, cream of tartar, and salt; set aside. In a large mixing bowl beat butter with an electric mixer on medium-low speed till smooth. Add powdered sugar and 1 cup of granulated sugar; beat on medium-high speed till fluffy. Add oil, eggs, and almond extract; beat just till combined. Gradually add dry ingredients, beating on medium speed just until combined. Cover; chill for 30 minutes or till needed. To shape cookies, roll rounded teaspoonfuls of dough into balls. (The dough will be soft.) Arrange balls on ungreased cookie sheets. With the bottom of a glass or a cookie stamp flatten the ball to about ¼ inch thick. I prefer a flat bottom glass dipped in sugar; it makes it easier and more uniformed. Bake in 350 degree oven for 10 to 12 minutes or till the edges are just lightly browning. Cool on a wire rack; cool completely before attempting to frost. Makes 55 to 60 cookies from what I have written down from past batches. The Scrumptious Almond Frosting In a small mixing bowl beat ½ butter (again only real unsalted butter) with an electric mixer on medium speed till fluffy. Beat in ½ teaspoon of almond extract and ½ teaspoon of vanilla. Alternately add 2 ½ to 3 ½ cups sifted powdered sugar and 3 tablespoons of light cream or milk, beating until smooth and of spreading consistency. You can tint with a bit of food coloring. NOTES AND SUGGESTIONS: I get rave reviews on these cookies and I also adjust them for different occasions. I do the basic recipe for Christmas and break two candy canes in a Ziploc bag into small pieces and sprinkle it on each cookie. You can also poke a hole through the top of the cookie with a straw to create a ribbon hole to hang them from the Christmas tree. I change the frosting extract to lemon with a bit of zest for summer. If you need a shaped cookie just roll it out in small batches and dust your surface with powdered sugar instead of flour on a surface such as a Silpat. Once you make these, you will be hooked. You almost can’t mess them up! You can use royal icing to decorate but the frosting recipe listed is amazing. Oh, and the cute shimmer you see on mine? Disco dust! You can order it online or if you live in Fresno head over to the amazing Creative Cakes and More Shop. Al Hodges and Manna From Heaven I have always loved a good beef sandwich and the site of this one made me swoon. More than that Garden and Gun Magazine did a wonderful article on the inventor Al Hodges and his faith that brought the existence of this sandwich to him. This was manna from God and he shared this wonderful recipe with everyone that walked into his shops. I decided as soon as I saw it that I had to get out to the store and make this for dinner that night. I did not deviate from the recipe at all for this first try. We loved the sandwich but for we Californians we would switch up the sauce a bit. It has a tart taste from the Catalina dressing so I would just cut it in half next time. I would also add about 2tsp. of fresh crushed garlic, pepper to taste and a couple of teaspoons of your favorite hot sauce. I wouldn't add and salt unless you are using low sodium soy sauce. That hot melted cheese, flavorful meat and dripping sauce make for a sandwich the family will be asking for again and again. Thank you Garden & Gun for another great article and piece of history! Please follow the link to Garden & Gun for the full recipe. The story of this warm sandwich will also warm your heart.  I love beans. No, I mean that I really, really love beans. So much so that as I took a stroll recently through the Ferry Building in lovely San Francisco with a few friends, I was overly excited to for them to go into Rancho Gordo. I thought maybe they might think I was a little nuts as they saw my excitement but to my delight they too were excited! So we bought a big box of different bean gems and had them shipped home. Now, Rancho Gordo is no ordinary bean place and anyone might fall for beans in that place. Be sure to go if you ever get in the vicinity of the place. I say all of that to say, try this chicken chili. I make this even in the Summer because it just makes me happy. The spices with the chipotle peppers are just mouth watering. I didn't do a big photo shoot for this recipe and quite honestly I clicked a quick picture seconds before devouring it. I want to share my love of food and spice but I never want a camera to come in between me and my time in the kitchen. Try this, you'll love it!  Ingredients
Directions This is a pretty standard chili build. Place a small amount of butter in a soup pot and add the chicken. Brown it and then add onions, bell pepper, salt and pepper, cook until the onions are translucent. Next add in the garlic. Let that cook for about one minute and then add the flour, stir for about one minute. Add in the tomato sauce and water, bring to a boil. Now let's add in the chili powder, red pepper flakes, onion powder and garlic power. Your kitchen should be smelling pretty great about now. Chop up the chipotle peppers and put those and the juice from the can into the chili. Turn all of that down to a simmer and let in marinate for a minute while you open, drain and rinse the beans. Add those beans right in and give it all a stir. Let that beautiful pot simmer for 30 minutes. I like to have shredded cheese, Frito's, avocado, green onions and sour cream on hand as toppings. Enjoy!
 This is a super easy pork tenderloin recipe that will please everyone and impress them as well. You can use this recipe for pork roast and chicken too with the same mouth watering outcome. I do mine in a dutch oven because it really locks in the moisture but an oven safe pan with a tight foil cover works great too. Ingredients 1 Pork Tenderloin 1 teaspoon of salt 1 Tablespoon of Black Pepper 1 Tablespoon of Butter 1 Tablespoon of Oil of your choice 1 Sliced Onion 3 Cloves of Smashed Garlic (just whack it with the flat side of the knife to release flavor.) 1/4 Cup of Lemon Juice 1/4 Cup of Chicken Broth Preparation Season the pork Tenderloin with the salt and pepper and set aside. Heat 1 Tablespoon of butter and one tablespoon of oil in an ovenproof dutch oven or pan. When that starts to sizzle drop in the meat and brown on all sides and then remove from the pan. Add the stock and lemon juice to the pan and stir to get all the good bits off the bottom of the pan. Put the meat back in. Drop in the garlic and cover the top of the meat with the onions. Cover tightly and bake on 350 for about 45 minutes or until meat reaches a safe temperature which for pork is 145 rare, I go to 155 for tenderloin. Let the meat rest in the juices for ten minutes before slicing. I serve this with rice pilaf and a vegetable. Everyone raves about it and it only takes about 15 minutes to prep and put in the oven Enjoy!
Cake
1/2 Cup of Butter 1 Cup of Sugar 2 Eggs 1 1/2 teaspoons of Almond Extract 2 Cups of Flour 2 1/2 teaspoons of Baking Powder 1 teaspoon of Baking Soda 1/2 teaspoon of Salt 1 Single Serving of Yogurt 1/3 Cup of Milk 1 Large Can of Peaches (Heavy Syrup or own juices will work) Topping 1 Cup of Brown Sugar 1 teaspoon of Ground Cinnamon 1/2 Cup of Sliced Almonds 1/4 Cup of Flaked Coconut Glaze 2 Cups of Powdered Sugar 2 to 3 Tablespoons of Milk 1/2 teaspoon of Almond Extract Directions As with most cakes, mix the sugar and butter until it is fluffy. Add eggs, almond extract and why not throw the yogurt in while you are at it and mix a bit. Add all the dry ingredients to the wet and mix well. Drain the peaches and add by hand. Grease a 9x13 pan and pour the cake into it. For the topping mix the brown sugar, cinnamon and butter until it forms a crumbly mix. By hand add the almonds and coconut and then spread the topping over the cake. Bake at 350 degrees for 35 minutes or until it is the color of gold you like. Let the cake cool completely. Whisk glaze ingredients until it is the consistency you like and drizzle it on the cake. Enjoy! 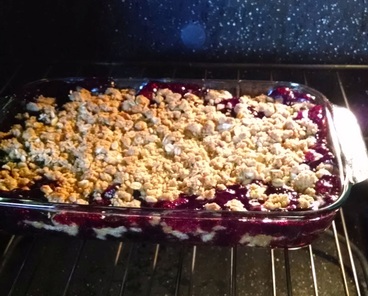 Kaitllynn spends a good portion of her free time on her smart phone which makes this momma nuts. I forget that teenagers do not want to remake an episode of The Waltons in the kitchen. I get the stink eye whenever I call her down and start telling her how tired I am of seeing a headphone stuck in one ear and her eyes glued to that phone screen. Today in a moment of weakness in between the need to be cool she said it would be nice to bake a blueberry crisp with me. I jumped at the chance! As soon as we got into the recipe she perked up and she was delighted when she pulled that beautiful pan out of the oven. Ingredients
2 Cups Fresh Blueberries 1 Cup Granulated Sugar 2 teaspoons Cornstarch 1/2 Cup Water 2 teaspoons Lemon Juice 1 Cup Flour 1 Cup Light Brown Sugar 2 teaspoon Cinnamon 1 Cup Old Fashioned Oats 3/4 Cup Melted Butter How To Pour the blueberries into an 11x7 baking dish. In a small bowl mix sugar, cornstarch, water and lemon juice. Mix it well and be sure the cornstarch is completely mixed in. Pour this mixture over the blueberries. Mix the flour, oats, brown sugar, cinnamon, and butter in a bowl. Mix until it is a crumbly misture and sprinkle it all over hte blueberry mixture. Pop it in the oven and bake at 350 for 30 minutes. Serve it warm all on it's own or with some strawberry ice cream for an extra special treat. Enjoy! |